Creating an Ameritas WL Illustration from the Leveraging Spreadsheet
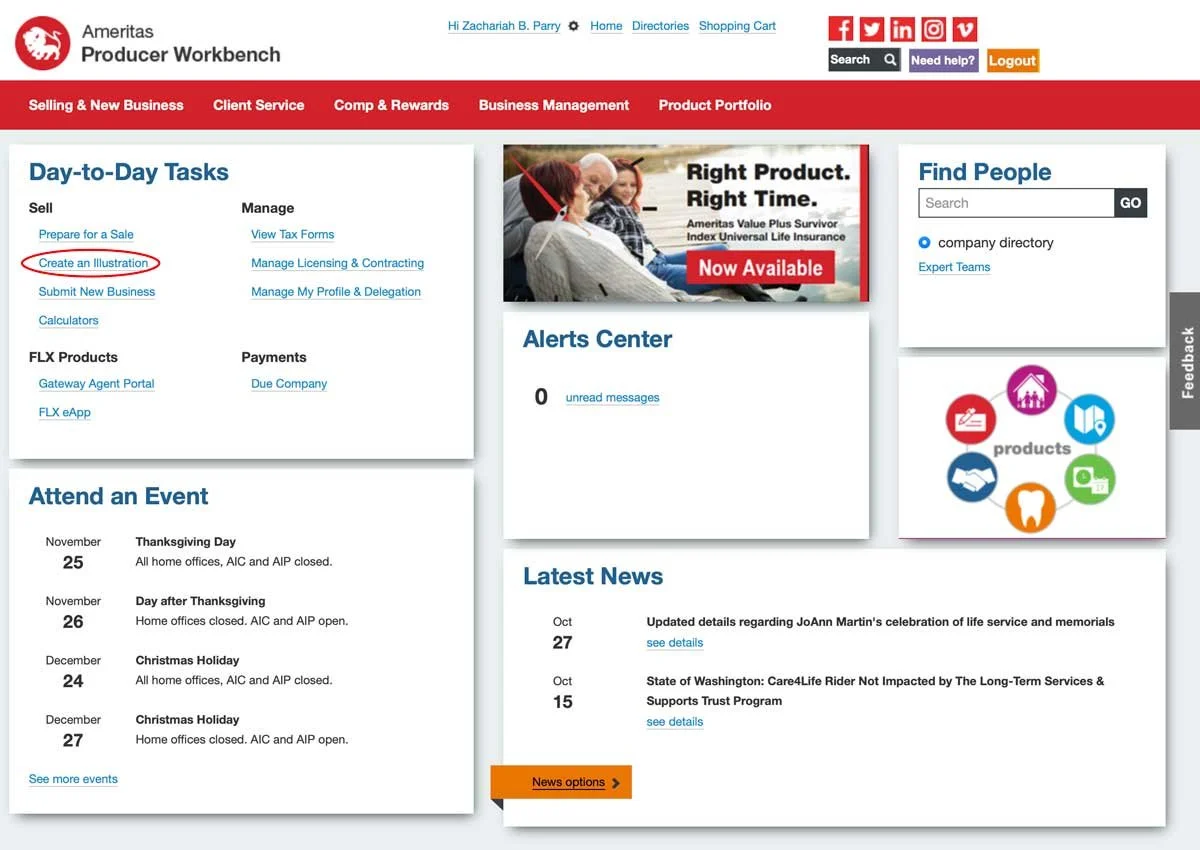
Once you’ve logged in, you should be at the Producer Workbench main page. Click on “Create an Illustration”:
Click on “Launch LifeDesigns now >>”:

Click the “Login” button:

This will bring up a new window. Click “Clients and Cases”:

Click on “New” on the right:

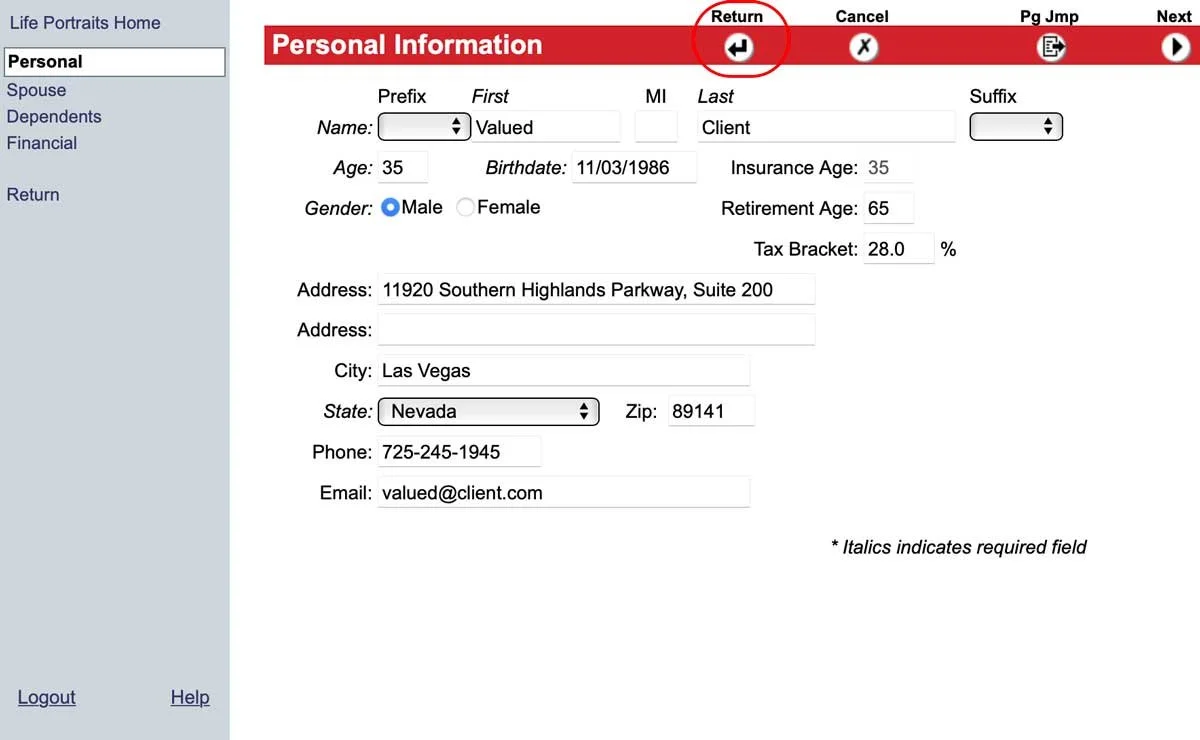
This will bring up the illustration software for a new case. You will start on the “Personal” tab (the tabs are on the left). You will need to insert your client’s information here.
The tax bracket is something you calculated and submitted when you originally requested the illustration spreadsheet. If you have forgotten what the tax bracket was, you will find it on the intake tab of the spreadsheet.
Fill out the form:

Once it is filled out, click the “Return” button at the top:
This just creates the client. We still have to create the illustration. When you click “Return,” it will take you back to the “Clients and Cases” page.
Make sure your new client is selected up top, then on the bottom box, select “New” then “Basic Illustration” to create a new case for that client:

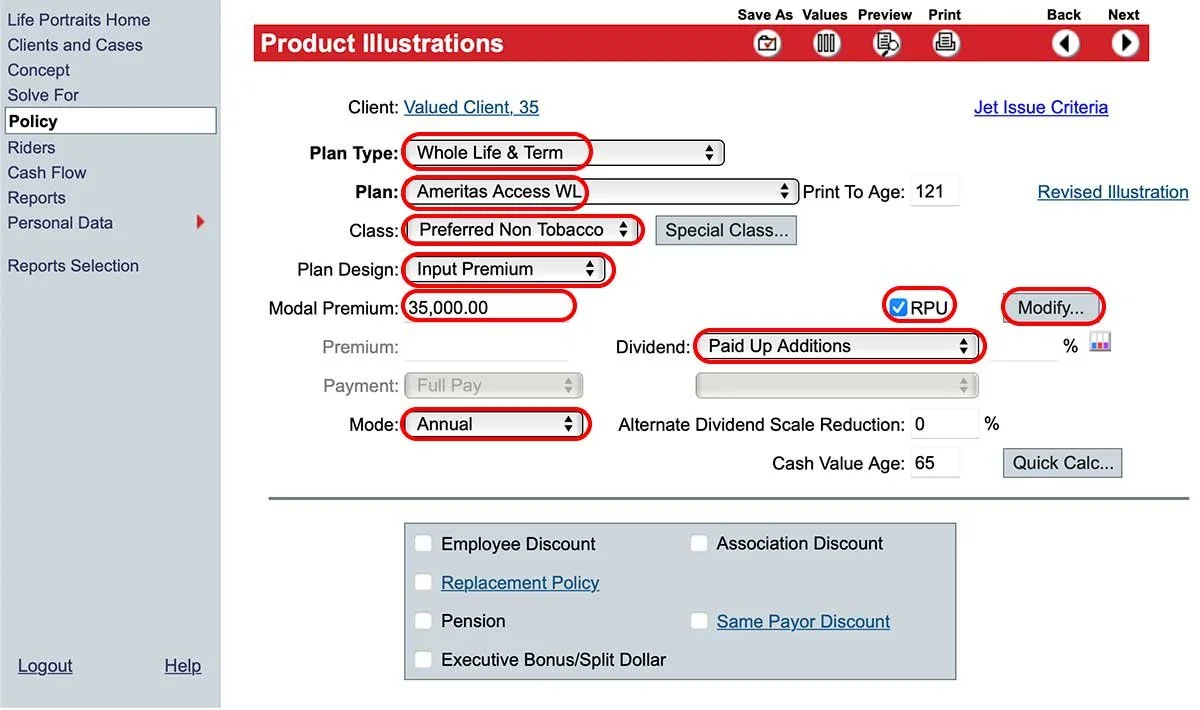
The “Product Illustrations” page will come up. Make sure to change the following fields as follows:
Plan Type: “Whole Life & Term”
Plan: “Ameritas Access WL”
Class: put whatever the leveraging spreadsheet was built on (which you selected when you filled out the form). That information is captured in the “input” tab of the spreadsheet if you’ve forgotten.
Plan Design: “Input Premium”
Modal Premium: This number should be 35% of the number in the AWL tab for this client in the leveraging spreadsheet. In this example, the client is putting in $100,000 of premium total, so I am going to put $35,000.
Check the box next to “RPU.”
Mode: Select “Annual.” In those cases where the client is not paying in a lump sum, but will be paying the first premium over time, then you will want to select “Monthly” and divide the total premium in “Amount” by 12.
Once you’ve input all of this info, click on the “Modify” button on the right, next to the RPU checkbox.
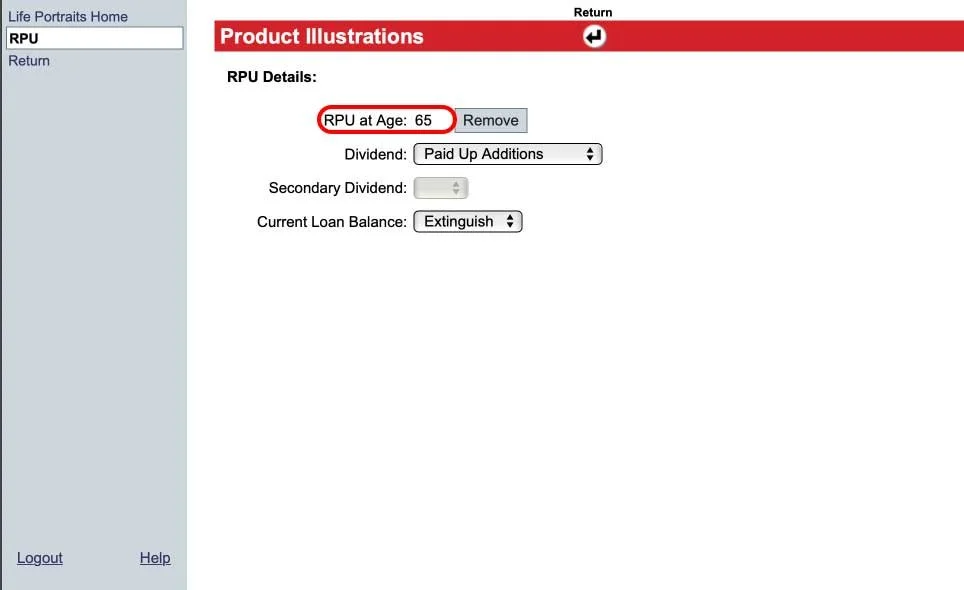
This will bring up a smaller window where you can put in the RPU year.
It gets a little complicated here, so if you’re not sure, make sure to drop us an email at Robin@thefortunelawfirm.com with questions.
When it comes to the RPU, we can illustrate it out 15, 20, or 30 years. And we want to get as close to 65 as we can (between 60 and 65 if possible). So depending on the client’s age, add 15, 20, or 30 years to it and input that age here.
In this example, my client is 35, and 30 years gets me exactly to 65, so that’s what I am going to put.
When you’re done, hit the ”Return” button at the top.
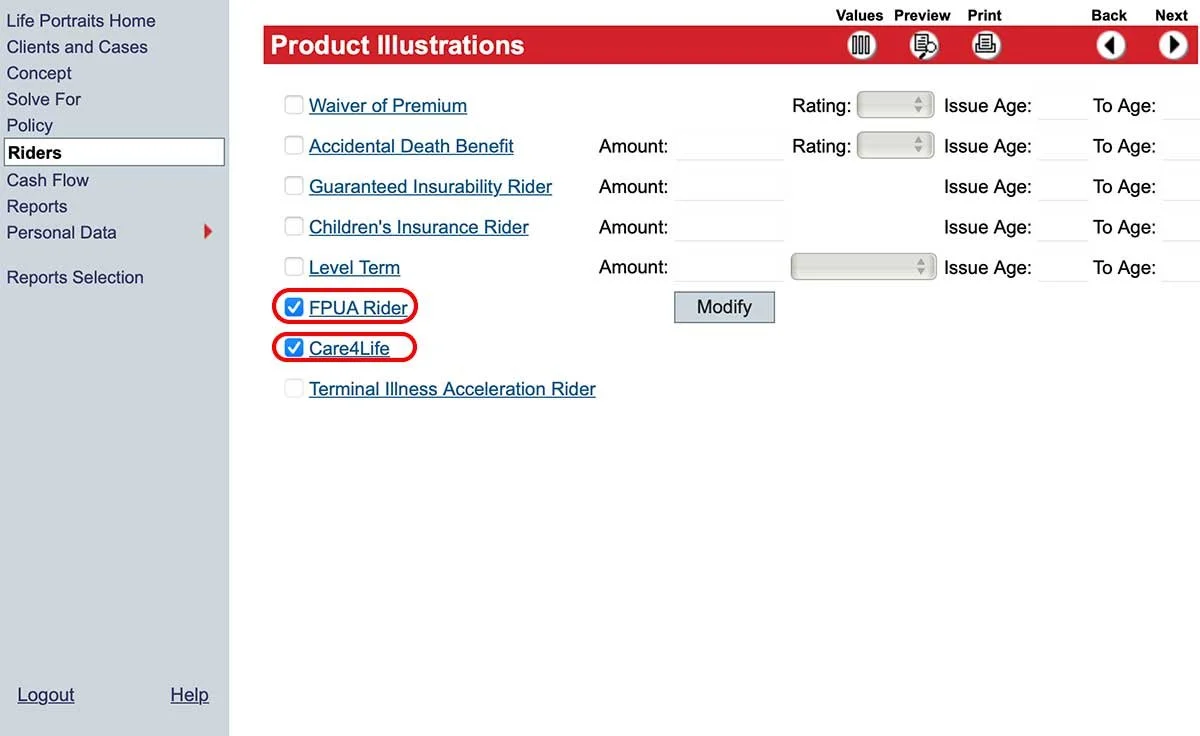
This will bring you back to the “Product Illustrations” page. Click on “Riders” on the left.

Make sure “Care4Life” and “FPUA Rider” are selected.
When you select “FPUA Rider,” it should automatically pop up a new window like the one below. If it doesn’t, click “Modify.”
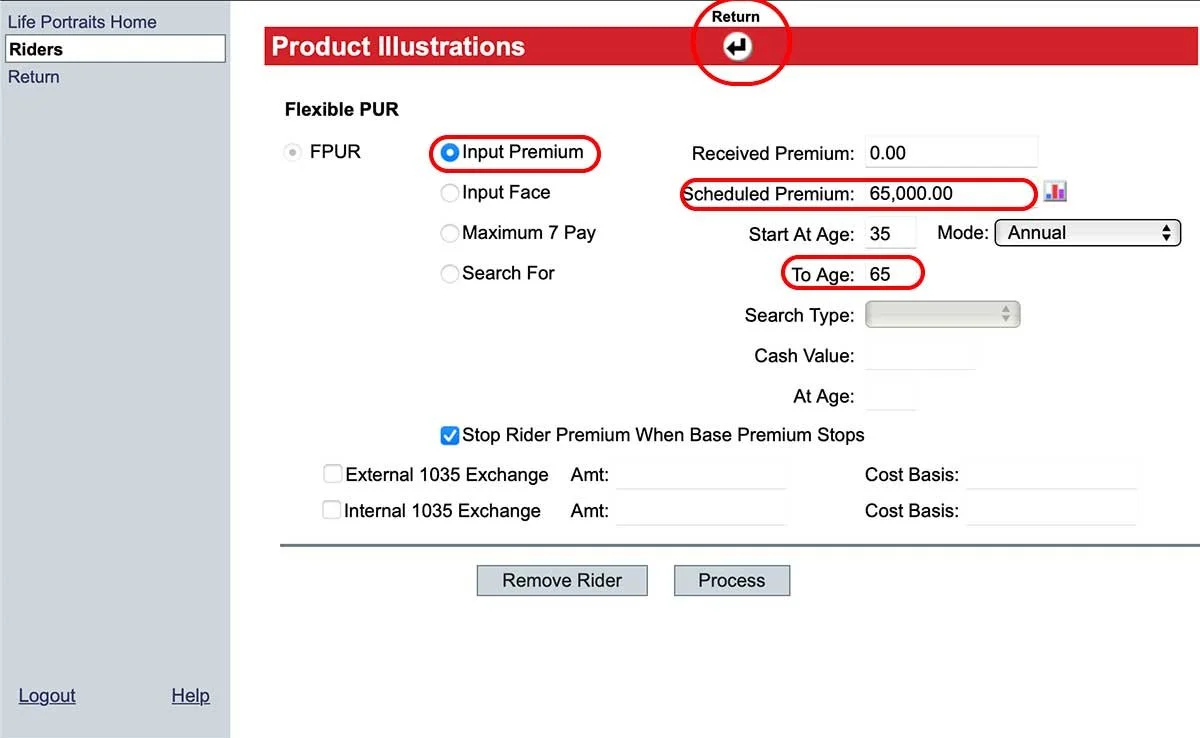
Make sure “Input Premium” is selected.
For the “Scheduled Premium,” you are going to put in 65% of the total premium here (to complement the 35% you put in earlier). The sum of this number and the modal premium should be your total premium. In this example, the client is paying a total of $100,000, so I am putting $65,000 here.
Where it says “To Age,” you are going to use the same number you used before for RPU (15, 20, or 30 added to their age).
When you’ve done that, click on “Return” to go back to the Riders page.
Click on “Level Term.”
The amount should match the total premium. For the drop down to the right of the amount, you are going to pick “15,” “20,” or “30,” depending on what RPU age you have been inputting. The number should be the difference between their RPU age and their current age.
To the right of that, where it says “To Age” you are going to input the RPU age again.
Once those values are inputted, click on “Values” up top to make sure it does not MEC.

If it is illustrated to MEC, it will tell you so with a warning window. If you don’t see this warning, you’re good. If you do, we need to make some adjustments. Click on “Return” at the top and then go back to “Riders.”

Now we need to keep adding term insurance until it doesn’t MEC. Increase that number a bit at a time until you have a number where it doesn’t MEC. In my case, probably because of the client’s age and the amount of time money was going to be going in, I had to increase the death benefit on the term insurance to $505,000. At that point, I no longer got the MEC warning.

Now that you have your values without your MEC, you can click “Preview” to get your illustration.
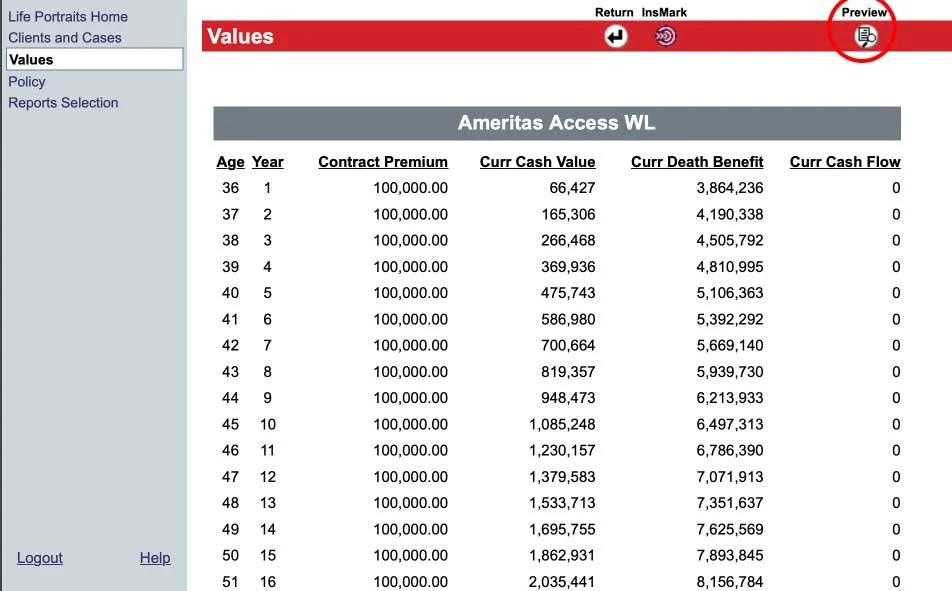
Your illustration should look like this at the header:
